
Note: this is meant for OS X El Capitan
Make sure you’re in a location on your drive of your preference.
$ cd ~/your_preferred_directoryDownload and install MeteorJS on your machine. As of this writing, the official instructions give us a single simple command:
$ curl https://install.meteor.com/ | shDownload the Android SDK tools.
$ curl -0 http://dl.google.com/android/android-sdk_r24.4.1-macosx.zip > android-sdk_r24.4.1-macosx.zipNote! This will download the 24.4.1 release. There may have been newer resources since the time of writing. To get the latest version instead, head over to the Android developers website and download the latest version for OS X.
Extract the file just downloaded.
$ unzip android-sdk_r24.4.1-macosx.zipEdit your PATH and bash environment. To do this, please run:
$ vim ~/.bash_profilePaste in the following text at the END of the file:
    # for working with android
    export ANDROID_HOME="${HOME}/your_preferred_directory/android-sdk-macosx"
    export PATH="${HOME}/FOSS/your_preferred_directory/tools:${PATH}"
    export PATH="${HOME}/FOSS/your_preferred_directory/platform-tools:${PATH}"
Extra notes and tips:
- Be sure to change “your_preferred_directory” above into the actual directory name you had used as download location.
- To get out of vim after you’re done, hit the Escape key, then type: :x and hit Enter
Make those changes you made above available in your command line environment.
$ source ~/.bash_profileRun the Android SDK manager tool.
$ android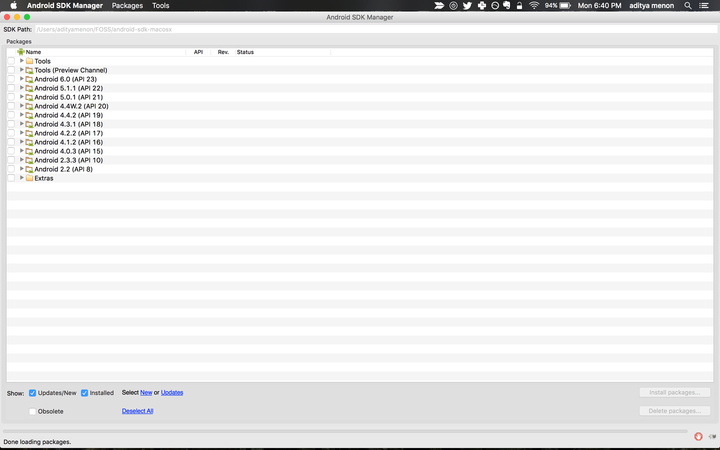
Initial state of the Android SDK Manager
Download and install the required Android SDK packages for cordova simulation and development. As of this writing, these are:
1. Tools\Android SDK Build-tools v22.0.1
2. Android 5.1.1 (API 22)\SDK Platform
3. Android 5.1.1 (API 22)\Intel x86 Atom_64 System Image
4. Extras\Intel x86 Emulator Accelerator (HAXM installer)
Now, we need to still actually install the Emulator-Accelerator.
    $ cd ~/your_preferred_directory/extras/intel/Hardware_Accelerated_Execution_Manager
    $ open .
This will open up the directory in a new Finder window.
Now double click and follow all instructions to install IntelHAXM_1.1.5.dmg
Let’s create an emulator device.
$ android avd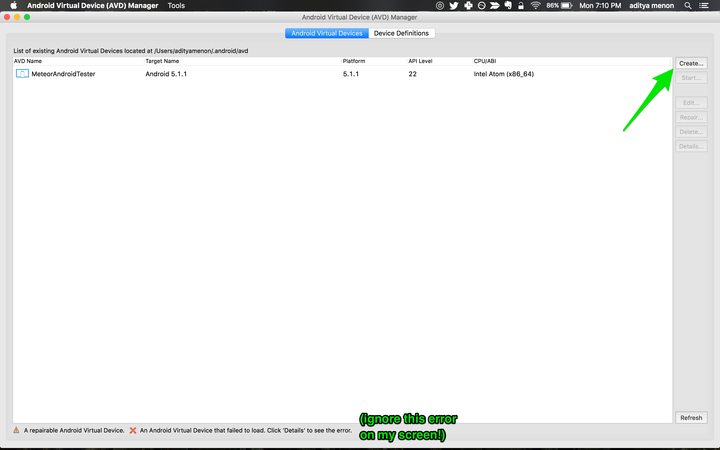
Android AVD - initial state
Hit the Create… button
Feed in a Name of your choice, a Device of your preference, Choose a “Target” (API 22), a “Skin”, and any other settings you need to change.
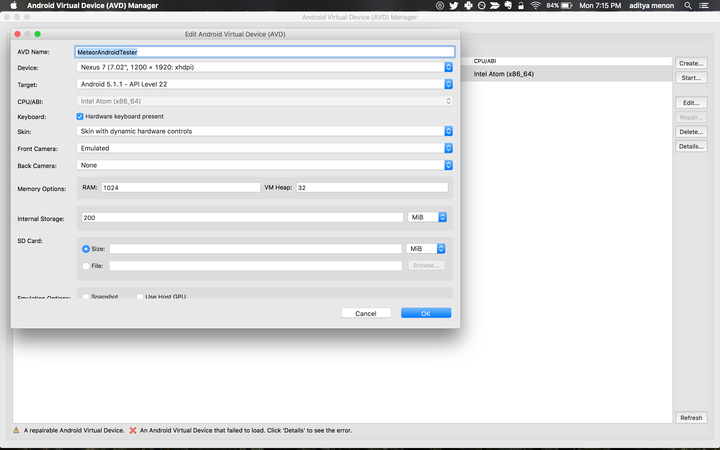
Android AVD - create screen
Hit OK. Close the AVD window.
Now run the adb server
$ adb start-serverMake sure to enable “Developer Options” in your phone, and enable “USB Debugging”. Details on how to do that are available here: https://stackoverflow.com/a/16707217/443219
We’re finally ready!
Connect your Phone with a Data-capable USB cable (not a cheap one that only transmits power).
Make sure that the phone appears in the list of devices when you run:
$ adb devicesIf not, you’ll need to debug that first - your device is not being recognized by the ADB server on your laptop.
cd to your Meteor project directory, and run
$ meteor run android-deviceRejoice as your app appears on the Android phone!
All this is incredibly convoluted. Can’t wait for the time when it’s all much more straightforward!